The Boat Drake was developed for use on rivers like the Roaring Fork, Rio Grande, Colorado and Eagle. Green Drakes hatch in good numbers on these waters, and in the case of the Roaring Fork and Colorado, do so late in the evening. This “Lightning Round”, the hour or so right at sunset into the darkness, brings fish slashing the surface after the big clumsy drakes. The nature of this fishing is fast and furious and requires a fly that has a large silhouette, is durable and will float well. The Boat Drake encompasses all of these traits. The foam overbody acts as a life preserver for the fly, keeping it afloat after several maulings. I like to hang another fly off the back of this pattern. My Green Drake Cripple or even a large, dark colored Hare’s Ear are favorites to imitate the emerging nymph. This pattern is really a simple tie, utilizing aspects from several other patterns to fit the bill. The wing is tied Comparadun style, as I see no reason to split them, the tail is a heavy clump of moose hair, darker and heavier than the naturals; I believe the moose tail imitates a shuck more than a tail, but who am I to say? The foam overbody can be made from thicker 2mm foam for added floatation, and this is how I tie them for use out of the drift boat. This extra bit of foam makes a big difference in the flotation of the fly. I have also used the thinner 1mm Razor Foam for flies with a more slender silhouette. I think these can be valuable when wade fishing, where you get more than one shot at a fish and need a bit of a closer match to the real thing. I finish the fly off with a heavy hackle collar. I used a Hebert Miner saddle from Whiting Farms on this fly, in a medium brown-dun color. This shade is a great match for our Colorado drakes, and the Hebert saddles have sufficient length and fiber density for a fly this size. Even if you have no plans to make it out to fish the Drakes this year, tie some of these guys up. You never know when you’ll need them, and being prepared for hatches like this is half the battle.
Materials Needed:
Hook: TMC 5212 #10 or 12
Thread: Olive 3/0 Monocord
Wing: Natural Cow Elk Hair
Tail: Moose Hock
Ribbing: Brown UNI-Stretch Floss
Overbody: Olive 2mm or 1mm Razor Foam
Abdomen: Nature’s Spirit Nature’s Finest Dubbing, Olive Gray or color to match the naturals.
Hackle: Dun Saddle or Neck Hackle
Thorax: Nature’s Spirit Nature’s Finest Dubbing, Olive Gray
Head: Same as Thorax
Step 1
Attach the tying thread to the hook behind the eye and wrap a thread base to the mid-point on the shank. Return the thread to about a quarter of a shank length back from the hook eye. Cut, clean and stack a medium sized clump of elk hair. Measure this clump so it is as long as the entire hook. This wing length will seem long to your conventionally proportioned eye, but I assure you, the real drakes have HUGE wings.
Step 2
Hold the butts of the hair with the tips out over the hook eye and make three turns of thread over them at the twenty-five percent point. These wraps are simply going to gather the hair together. Do NOT let go of the hair.

Step 3
While holding the butt ends of the hair tightly, draw the thread taut by pulling it toward you. This will flare the wing, but keep it atop the hook. Make a few more tight turns of thread to anchor the wing.

Step 4
Make a tight band of thread traveling toward the rear of the hook over the butt ends of the hair to further anchor them in place. You need to have the thread spread out over some area (two to three eye lengths) to completely lock the hair down.

Step 5
Trim the butt ends of the hair from the back of the hook at an angle as shown. This taper will facilitate a smooth transition into the tail, making for a smooth body.
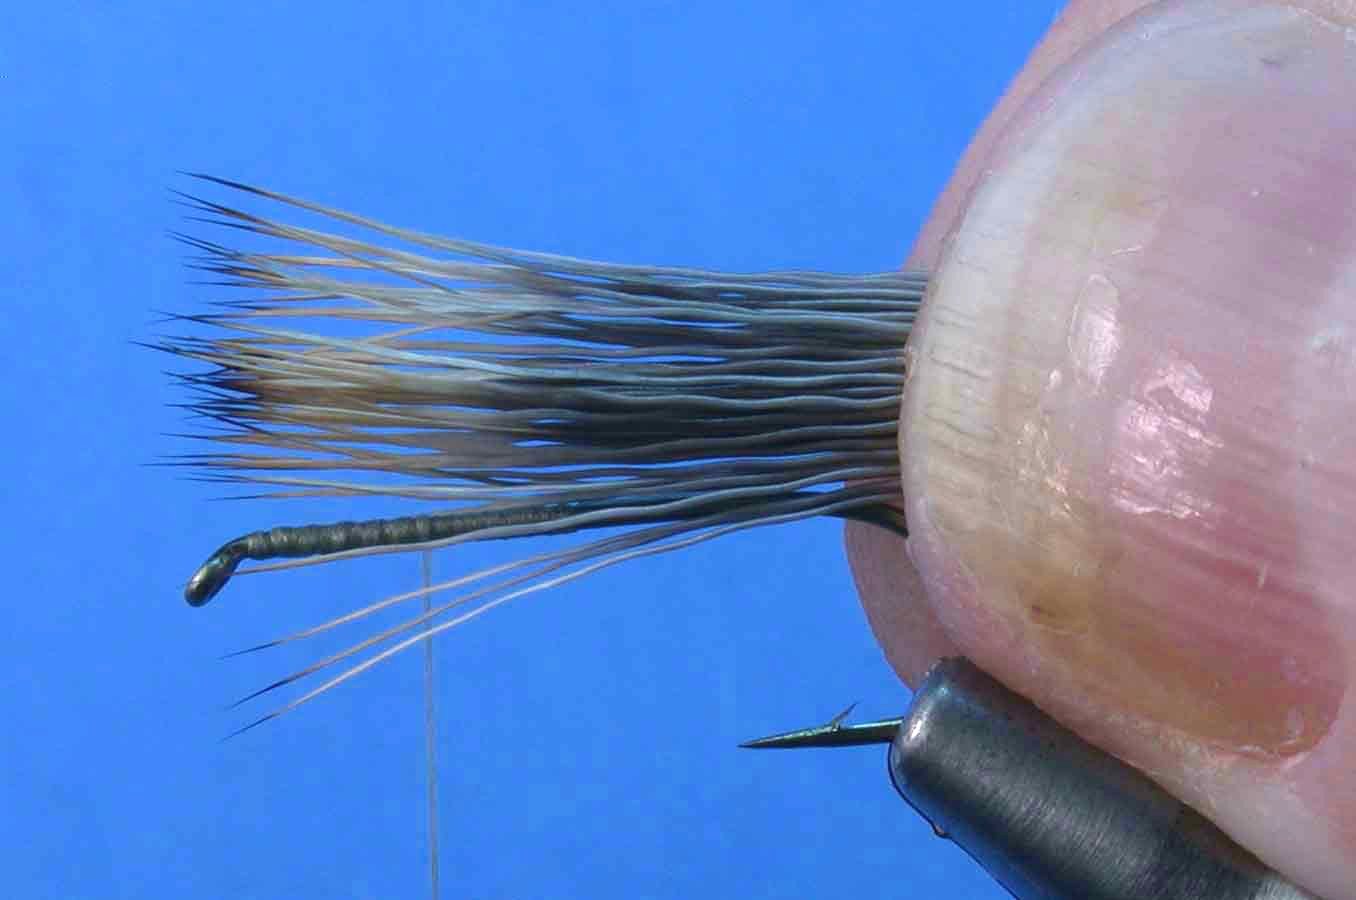
Step 6
Wrap over the stub ends of the wing butts to smooth them out, then travel back to the bend of the hook, laying a smooth thread base as you go. Cut, clean and stack a large clump of moose hock. I used about twenty to twenty-five hairs for the tail on this fly, so don’t be shy with the tail. Measure the moose hair against the shank so it is just slightly shorter than the hook shank, about 80% of its total length. Tie the tail in at the bend and form a tight thread band traveling forward toward the wing to anchor it. Do not trim the butt ends just yet.

Step 7
Continue wrapping forward over the butt ends of the tail up to the point where the wing butts terminate against the shank. Trim the tail butts at the opposite angle so they mesh into the butt ends of the wing, making a smooth transition from tail to wing.
Step 8
Spool up the UNI-Stretch floss in a bobbin (use a straight tube bobbin, flared tips don’t work with this trick) and leave a short stub of floss protruding from the end of the bobbin tube. Place the bobbin tube against the shank from the top as shown here. Make a single turn of thread over the bobbin tube as though you were tying it to the hook.

Step 9
While holding tension on the tying thread, withdraw the floss bobbin from the turn of thread by pulling the floss bobbin gently toward the rear of the hook. The thread will jump off the end of the bobbin tube and catch the stub end of the floss against the hook shank. Using the floss in a bobbin leaves no waste and makes it easier to spin and control the floss as you wrap it for the rib.

Step 10
Wrap back over the floss with the tying thread to the bend of the hook. Let the floss bobbin hang over the back of the vise so it is out of the way in the meantime.

Step 11
Cut a strip of foam (2mm used here) that is 4mm wide by 2mm thick. This photo shows the side and front view of the strip for clarity. This strip should be a few inches long at least, so you don’t have to cut a new strip for each fly.

Step 12
Tie the foam in on top of the hook shank just behind the base of the wing and wrap back over it to the base of the tail. Try to keep this strip centered on top of the hook shank as you go.

Step 13
Apply a thin strand of dubbing to the thread and begin wrapping it at the bend. Travel forward creating a tapered underbody as you go.
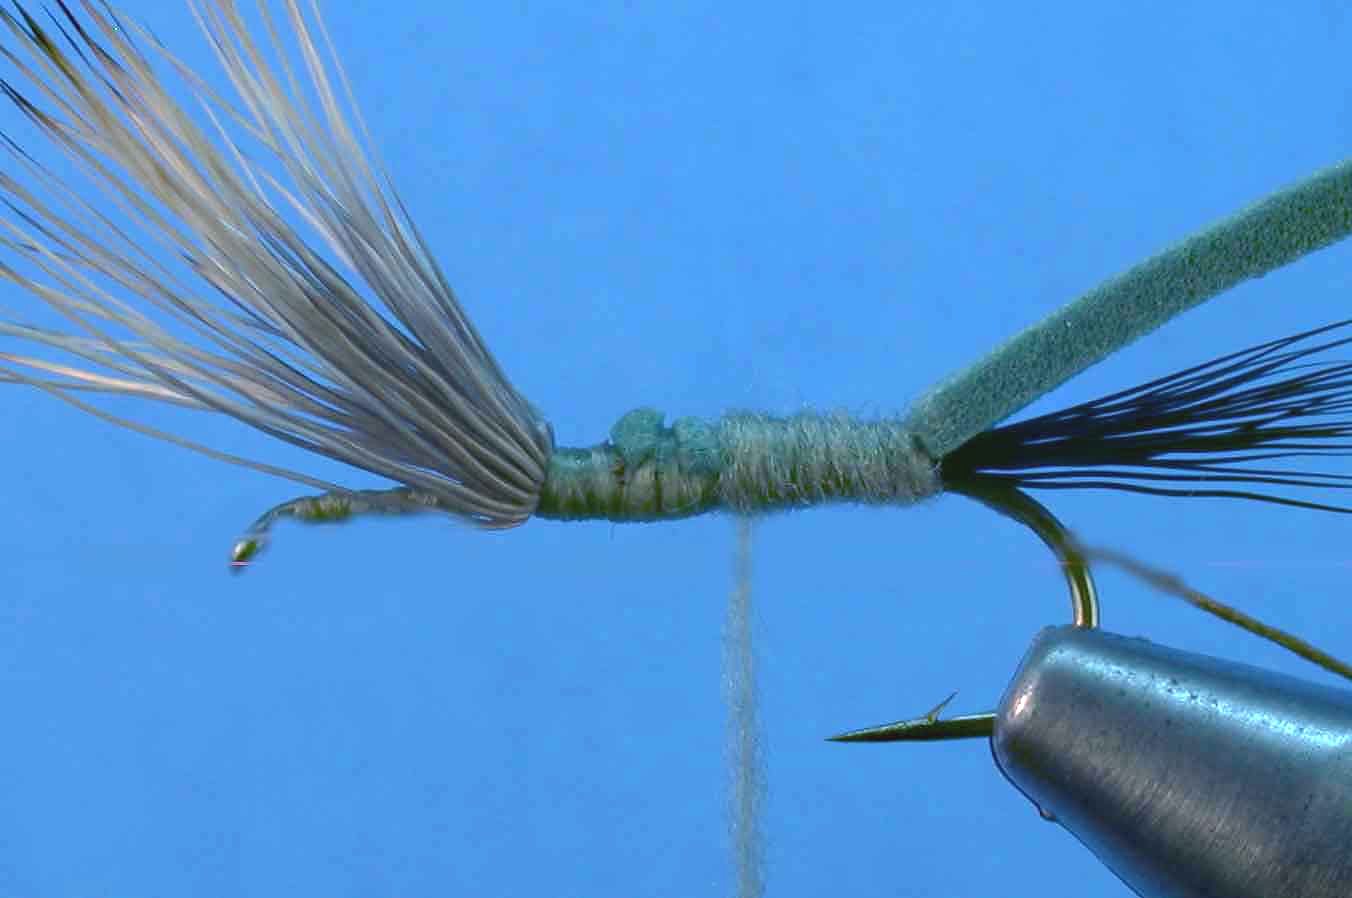
Step 14
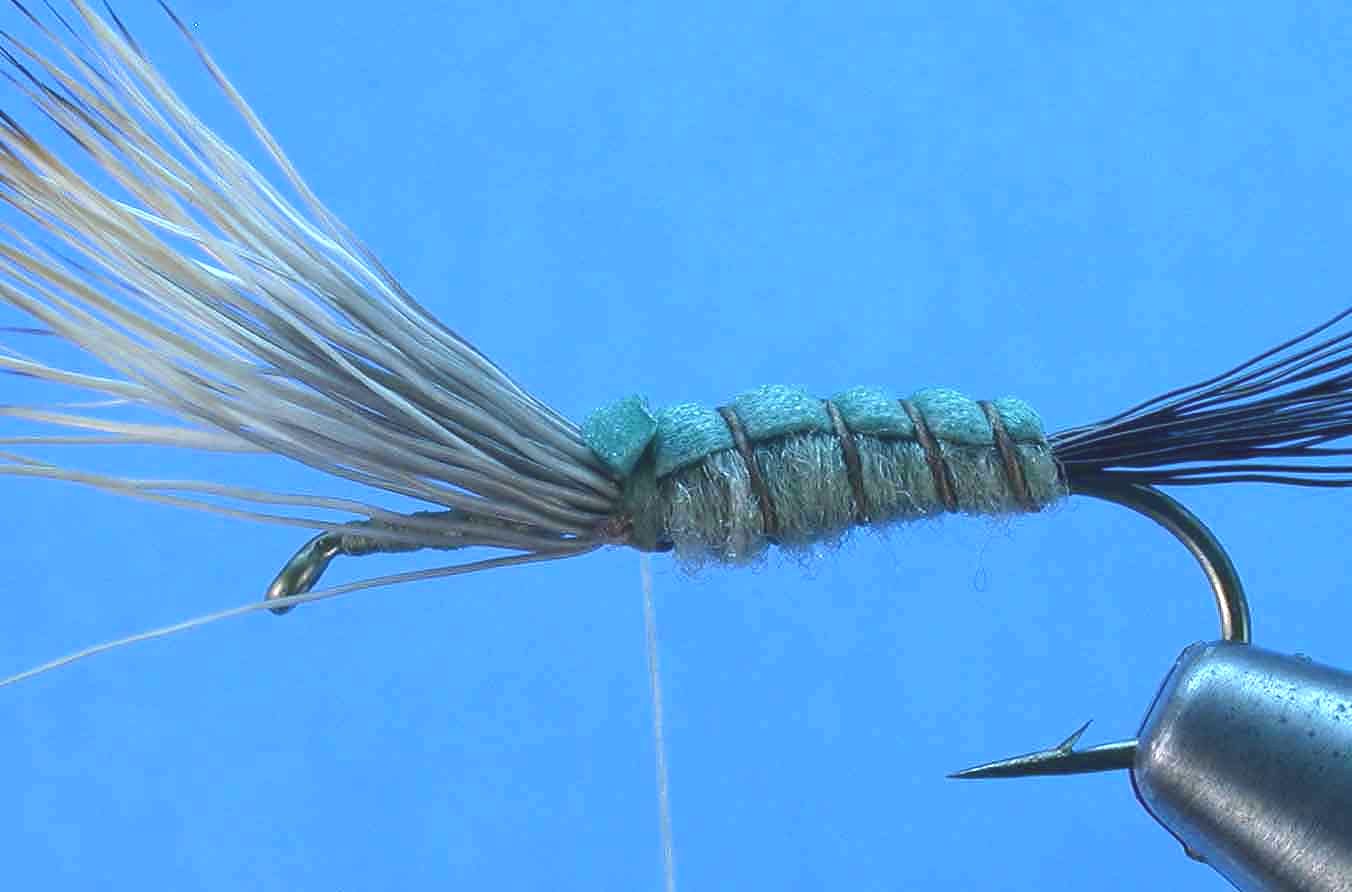
Finish the dubbing just behind the base of the wing. Pull the foam strip over the top of the dubbed abdomen and secure it with a couple tight turns of thread at the base of the wing. Do not cut the excess foam off yet.

Step 15
Spin the floss bobbin to cord the floss into a twisted rope. Rib through the body with the floss in evenly spaced segments as shown. Tie off the floss at the front of the body. Clip the excess foam and floss at this point. Be careful to pull some slack out of the floss bobbin before cutting it so it does suck back down inside the bobbin tube.
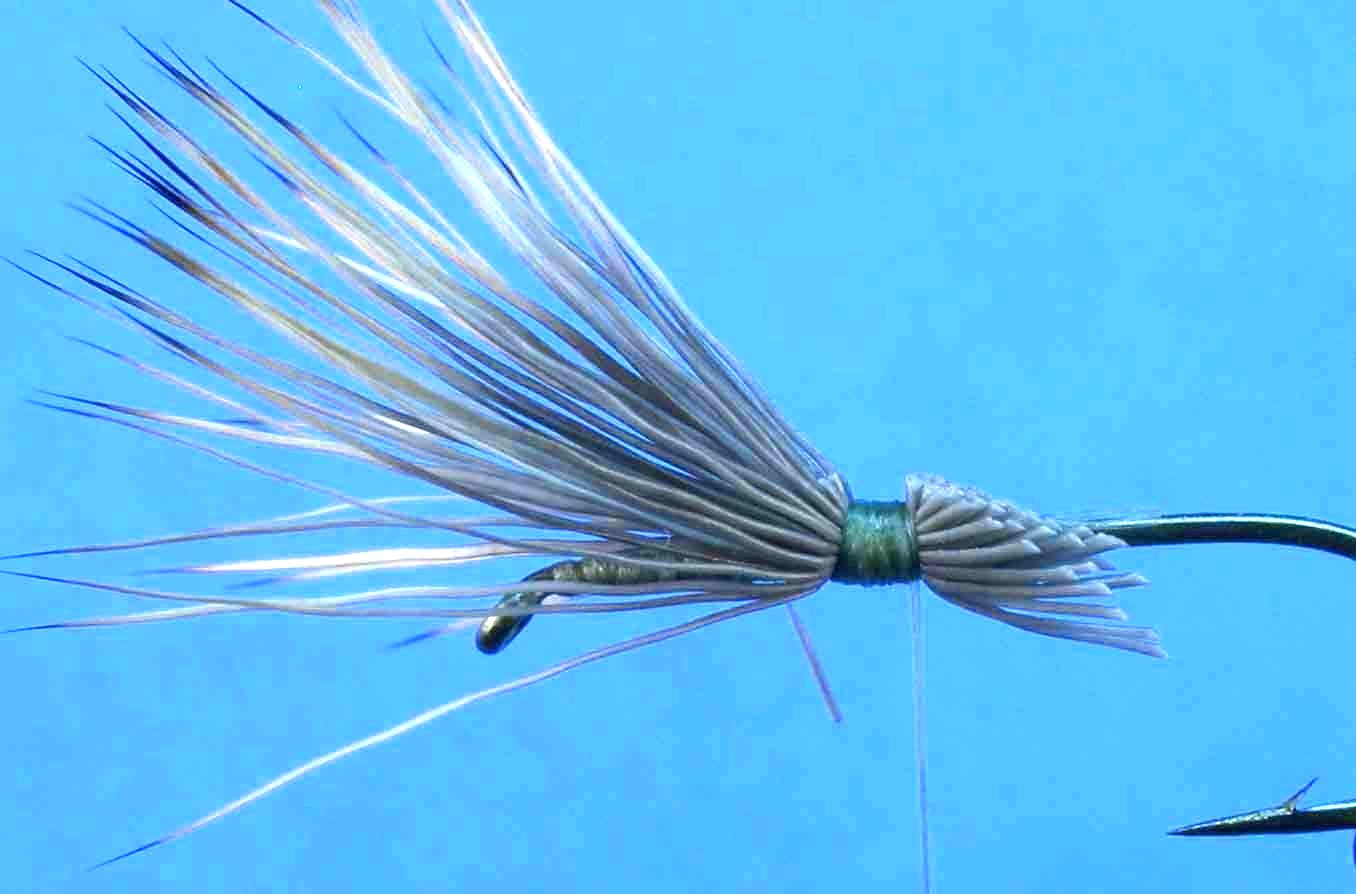
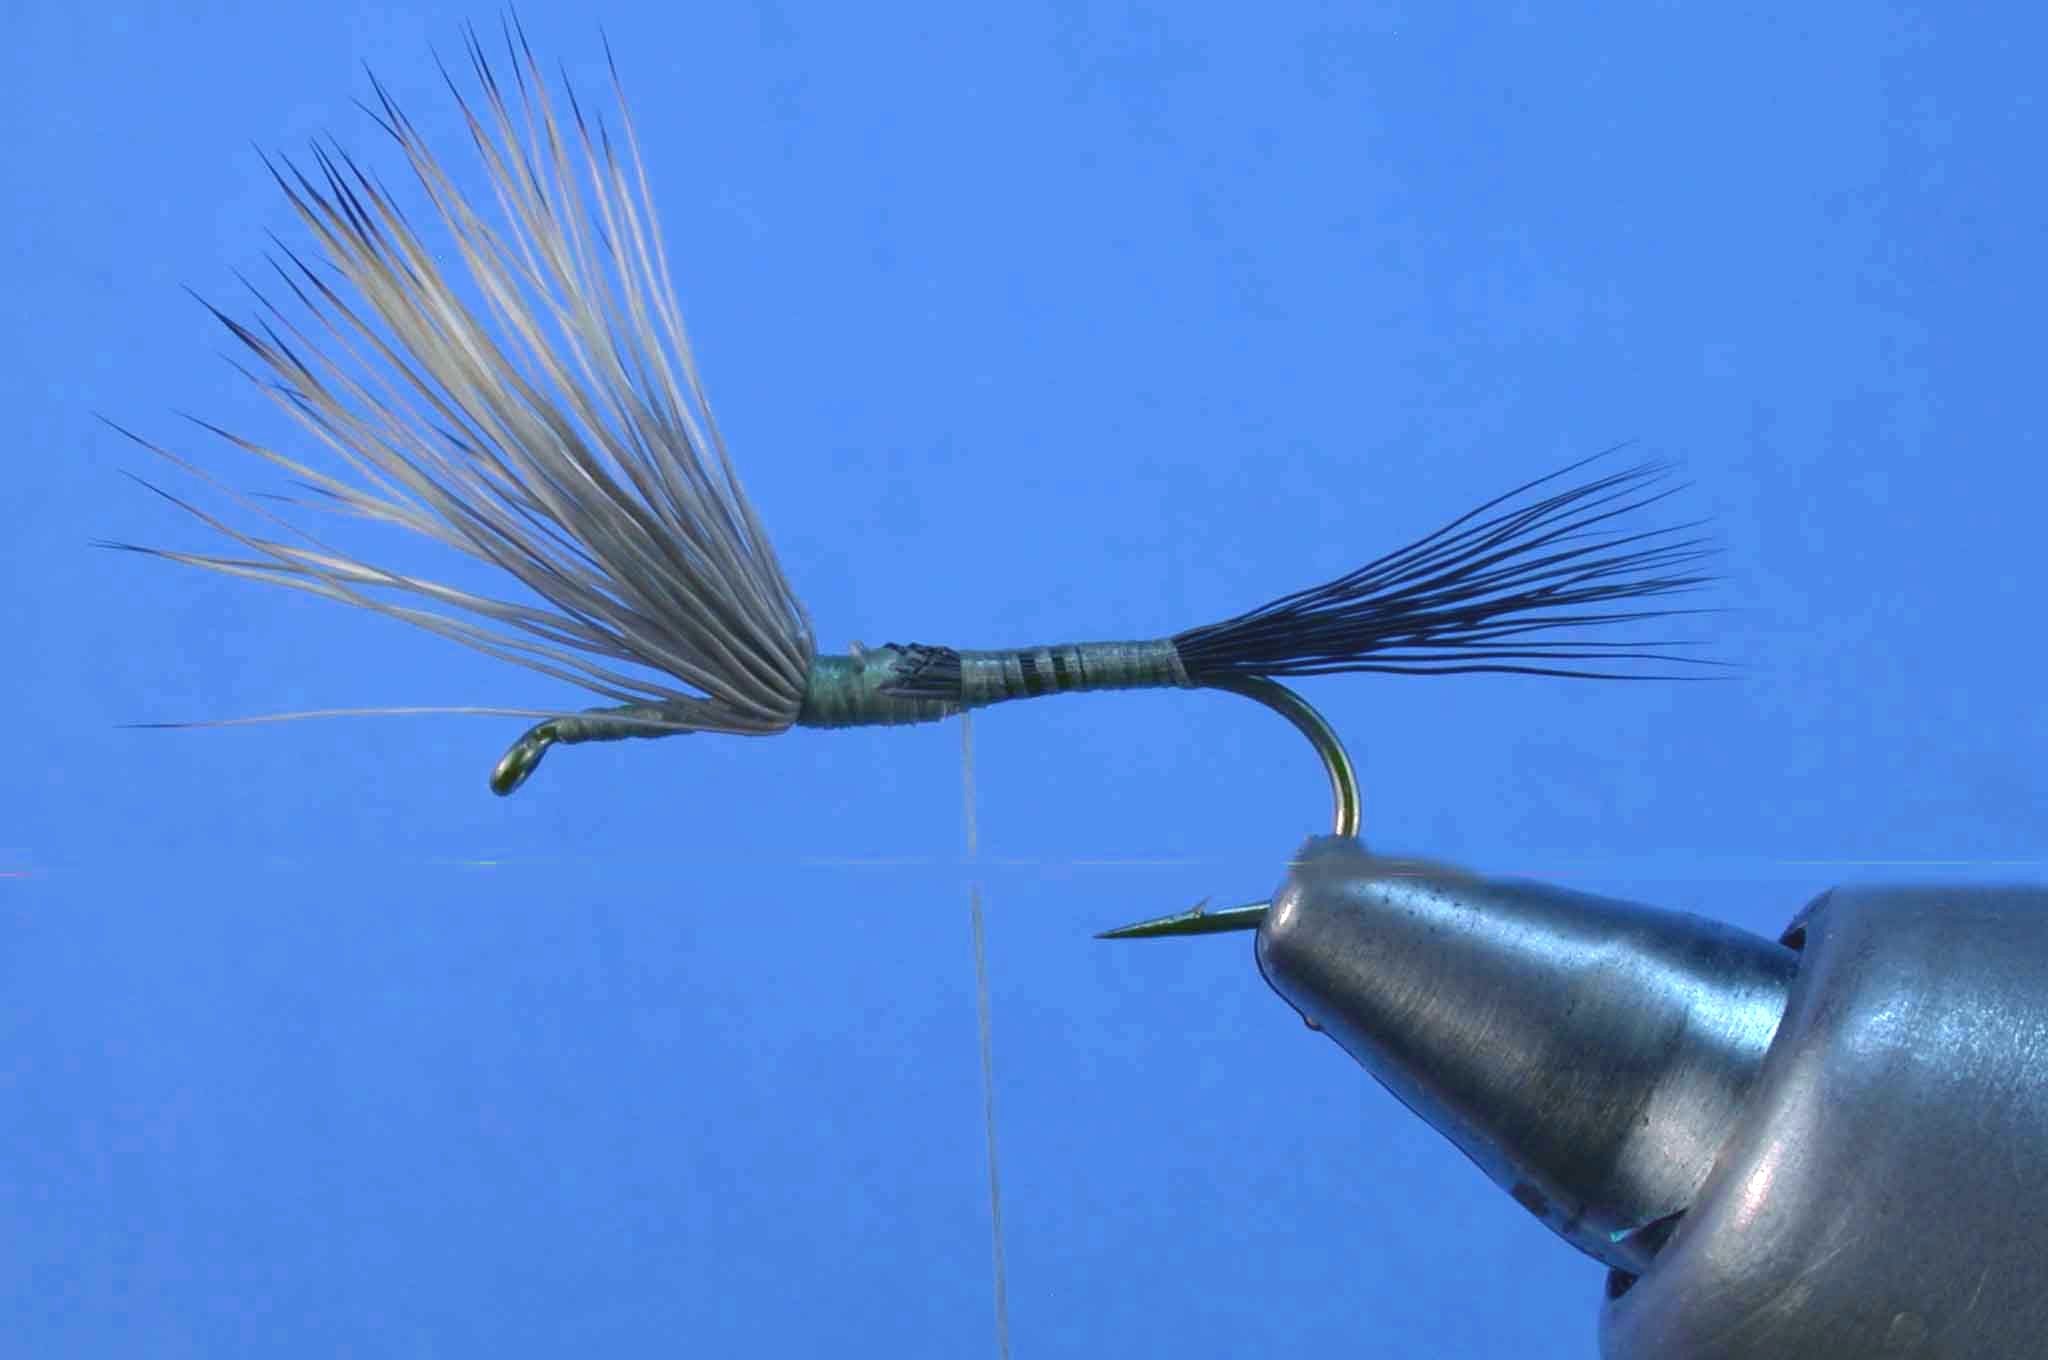
Step 16
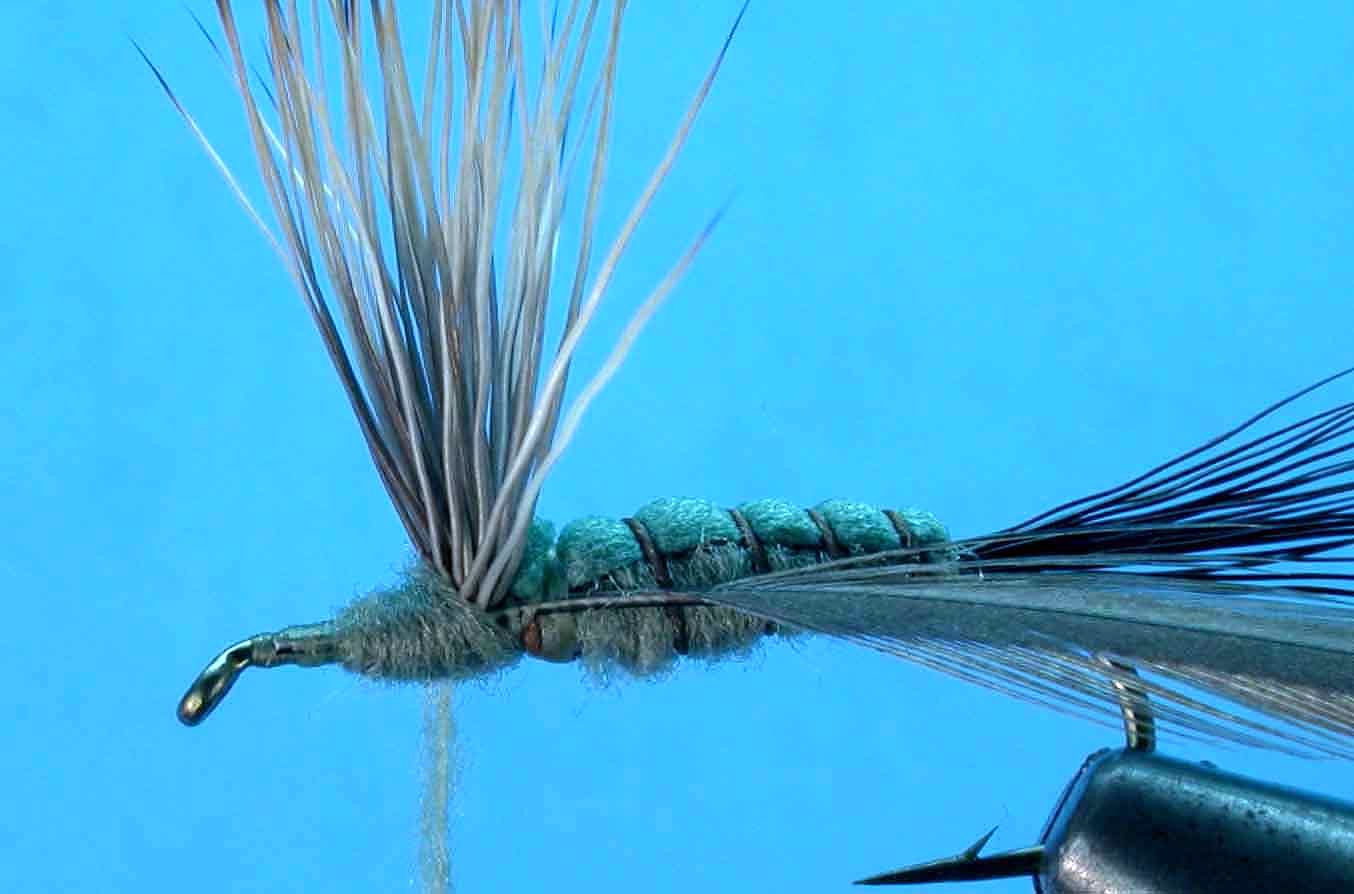
Lift the elk hair wing up and back along the top of the hook shank. Build a thread dam in front of the wing base to prop the wing up vertically. Make these wraps tight up to the base of the wing.

Step 17
Once the thread dam is built up, the wing should be standing up like this.

Step 18
Select and size a hackle feather. Prep the base by stripping the fibers from the base of the stem, exposing the center quill for a length of about one fourth of a shank length. Tie the hackle in behind the wing with the rest of the bare stem extending out to the front of the hook.

Step 19
Bring the thread in front of the wing and continue wrapping over the bare hackle stem to secure it. Cut any excess behind the hook eye and wrap over the stub.
Step 20
Apply another thin layer of dubbing to the thread and begin wrapping it about three eye lengths back from the hook eye. Continue wrapping the dubbing up to the base of the wing.
Step 21
Continue back with the dubbing behind the wing and onto the front edge of the abdomen. Wrap forward again to about two eye lengths back from the hook eye and finish up the dubbing there. Basically, you have just built up the diameter of the thorax region to match that of the abdomen. Yours looks just like this, right?

Step 22
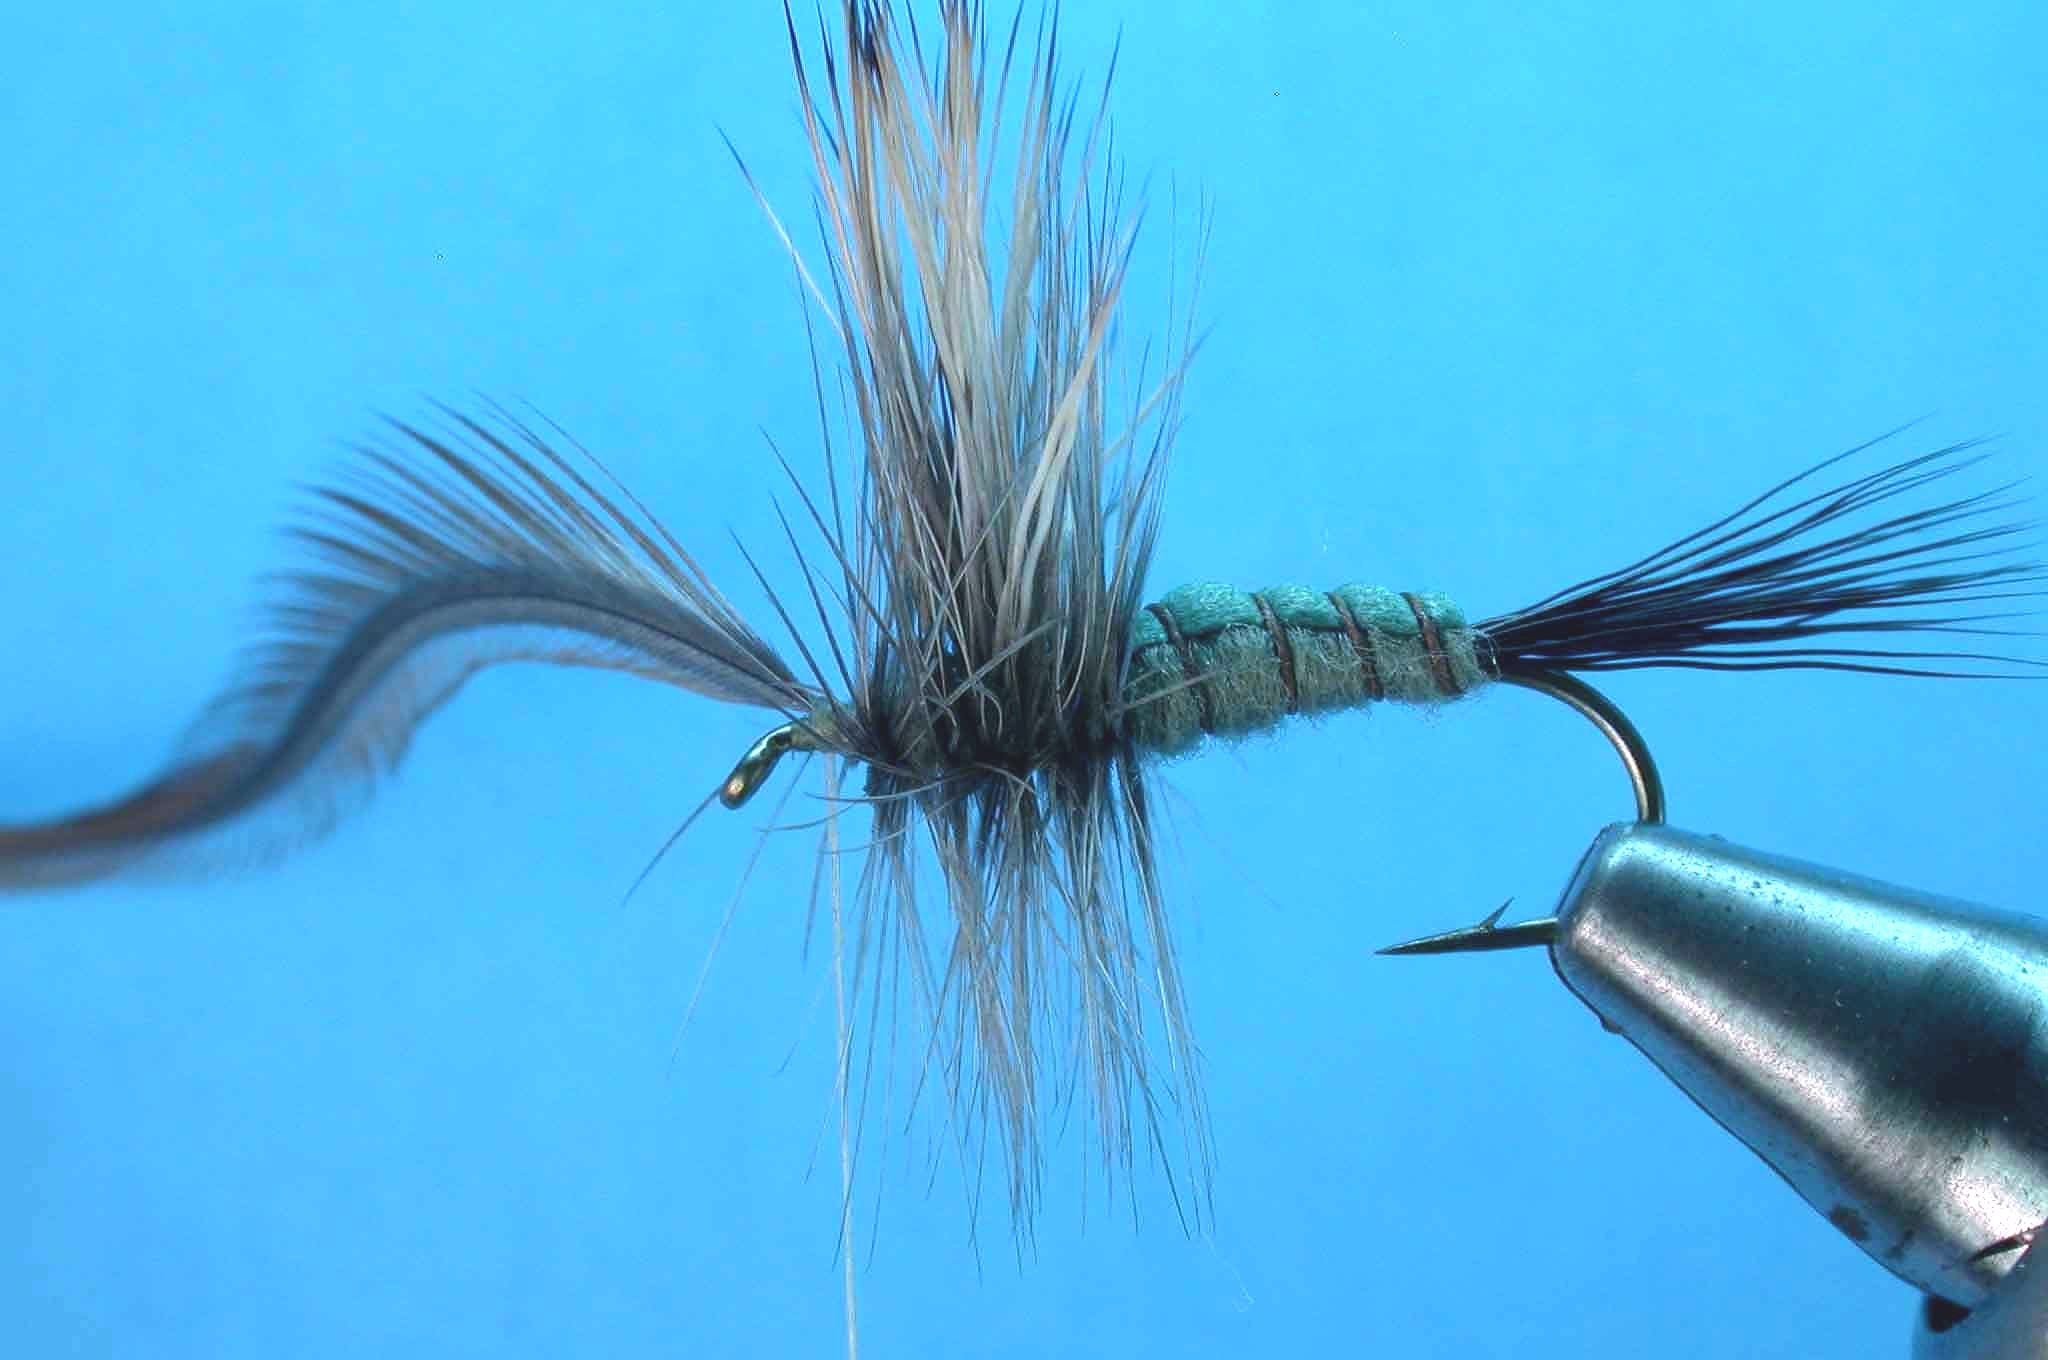
Wrap the hackle forward in close spirals. I try to make three or four turns behind the wing and another three or four in front of the wing. Tie the hackle off at the front of the dubbed thorax. Clip the excess hackle.
Step 23
You should now have a couple eye lengths worth of bare shank left between the front edge of the hackle/thorax and the hook eye.

Step 24
Add a tiny bit more dubbing to the thread and build a slightly tapered head that terminates at the front edge of the thorax. The diameter of the head and thorax should match as well. Whip finish at the hook eye and clip the thread.

Step 25
Finished fly, frontal view. Note the hackle has been trimmed even with the hook point. Trimming the hackle allows the fly to sit lower on the water and add some stability to the fly
